How to Splice Garden Rope: A Step-by-Step Guide
Founder & Lead Horticulturist at Gardener Expert · RHS Master of Horticulture, Certified Professional Horticulturist (CPH) · 16+ years in residential organic gardening, plant propagation, and structural plant training
Knowing how to splice garden rope is one of those skills that looks harder than it is. Unlike a knot, a splice becomes part of the rope itself. No loose tails, no gradual creep, no re-tying after rain.
According to data from the Cordage Institute, an eye splice retains around 90 to 95 percent of a rope's rated breaking strength. A well-tied bowline drops that figure to roughly 65 to 70 percent. That's a meaningful gap when you're trusting a join to hold a frame through a wet season.
Here's how to do it properly.
Quick Answer
To splice garden rope, unlay the strands back about 15 cm. Form your eye or butt the two rope ends together. Tuck each strand over one and under one, against the rope's lay.
Complete at least three full tuck rounds. Trim and seal the strand ends.
Why a Splice Outlasts Every Garden Knot
Every garden knot fails eventually. The reef knot slips under lateral strain. The cleat hitch works loose after a few wet-dry cycles.
A splice is different. It's a woven join that becomes structurally part of the rope, not just a loop sitting on top of it.
When you tie a knot, you compress and bend the rope fibers sharply around each other. That compression alone robs the rope of up to 35 percent of its rated strength. A well-made eye splice distributes load across multiple tucked strands instead, which is why its efficiency holds far higher on standardised load testing.
A knotted rope supporting a trellis frame will shift and sag over a season. A spliced loop won't. It also won't create a bulky lump that snags on mesh, wire, or plant stems.
For fixed attachment points like hanging baskets, rope guides, or extended support lines, a splice is the more reliable option. If you need an adjustable connection, a knot makes more sense.
A finished eye splice slips cleanly over a hook, ring, or post eye, whether you're working with hemp cord, sisal, or polypropylene. It holds firm and needs nothing from you once it's set.
Rope Types, Tools, and Prep: What You Need Before You Start
The right prep makes splicing much easier. Without it, you're fighting the rope instead of working with it.
What rope can you splice?
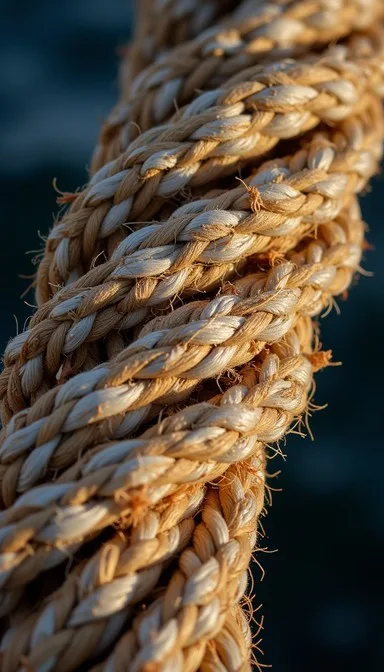
Only 3-strand twisted rope (also called laid rope) is practical to splice by hand. Braided rope has a core-and-sheath construction with no obvious strands to separate, so it needs specialist tools and a completely different technique. For garden use, 3-strand twisted is both easier to splice and easier to source.
As of 2026, jute and sisal remain the most widely stocked spliceable options in garden centres across the UK and US.
| Rope Type | Spliceable by Hand | Best Garden Use |
|---|---|---|
| Jute (3-strand twisted) | Yes | Light plant ties, natural look |
| Sisal (3-strand twisted) | Yes | Trellises, general supports |
| Manila (3-strand twisted) | Yes | Heavier frames, rustic finish |
| Polypropylene (3-strand twisted) | Yes | Wet conditions, longer service |
| Braided nylon or polyester | No | Not suitable for DIY splicing |
For heavier garden structures, a thicker jute cord handles more load before any join becomes necessary. Browse the garden twine section for a full range of spliceable options.
Tools you'll need
- Rope fid or Swedish fid: opens strand gaps cleanly
- Marlinspike: useful for stiff or tight ropes
- Electrical tape or masking tape: holds the unlay point and seals strand tips
- Sharp scissors or a knife
- A lighter (for synthetic rope ends only)
Prep steps
Tape the rope firmly about 15 to 20 cm from the working end. That's your seizing point, where the unlay stops. Strands below it get unlaid.
The rope above it stays intact.
Tape each individual strand tip before you start unlaying. This stops them splaying mid-splice when you need them most.
If you're using jute twine or sisal, dampen the rope slightly first. Natural fiber becomes noticeably more pliable when wet and much easier to work by hand.
Eye Splice, Short Splice, or Back Splice: Which One Fits Your Job
There are three splices worth knowing for garden use. Pick the right one before you start.
| Splice Type | What It Does | Best Garden Use |
|---|---|---|
| Eye splice | Fixed loop at a rope end | Hanging baskets, hooks, post rings |
| Short splice | Joins two rope ends permanently | Repairing a snapped support rope |
| Back splice | Seals a rope end to stop fraying | Finishing a cut rope end neatly |
Eye splice
This is the one you'll use most. It creates a permanent loop at the rope end, sized before you start tucking. The finished eye slips over a hook, stake, or ring and holds cleanly without shifting.
Short splice
A short splice joins two rope ends permanently. It's bulkier than a long splice but much stronger and far easier to make. For garden use, it's ideal when a support rope has snapped and you need to rejoin it without losing too much length.
The finished join is around 1.5 times the rope's original diameter.
Back splice
A back splice seals a raw rope end by turning the strands back into the rope body. It's neater than whipping and needs no thread or extra tools. The one downside: it thickens the rope end, so you can't thread it through a small fitting afterward.
For most garden jobs, the eye splice is the right place to start. It's versatile and approachable for beginners. Natural twisted cord like sisal and jute is particularly forgiving to learn on.
Step-by-Step: How to Splice Garden Rope
Work on a flat surface with your tools close. The core move in every splice is the same: over-one-under-one, against the lay.
Eye Splice: Creating a Fixed Loop at the Rope End
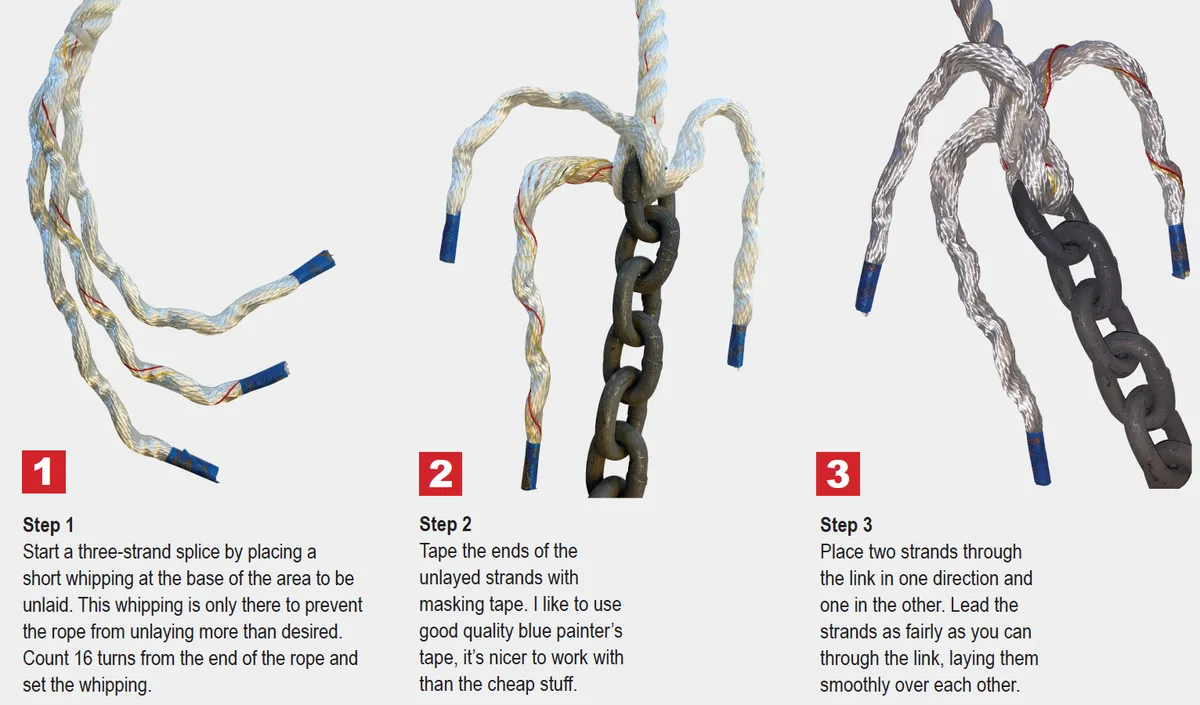
Mark and seize. Measure back about 15 cm from the rope end and tape firmly at that point. This stops the unlay spreading further than you need.
Unlay the three strands. Twist them out back to the tape. Tape each individual strand tip to stop fraying.
Form the eye. Fold the unlaid section back along the standing rope to set your loop size. An eye of 8 to 12 cm suits most garden hooks and rings.
First tuck round. Pass Strand 1 under a standing strand, working against the lay. Tuck Strand 2 one position to the left. Flip the splice and tuck Strand 3 under the remaining standing strand. All three should emerge evenly from three separate positions. A diagram here shows the fan shape well. If yours looks bunched, one tuck went the wrong way.
Repeat. Complete three full tuck rounds for light garden use. Use four to five for anything load-bearing. Pull each tuck snug before moving on.
Finish. Trim strand ends close. Heat-seal synthetic ends with a lighter. Whip natural fiber ends with twine.
Short Splice: Joining Two Rope Ends
- Unlay both rope ends about 15 cm. Interlock the strands alternately, one from each rope.
- Tape at the interlock point to hold everything in place.
- Tuck each strand from one side over-one-under-one into the opposite rope, against the lay.
- Flip the splice and repeat on the other side.
- Complete three rounds on each side. Trim and seal.
Mistakes That Cause a Splice to Slip, Bunch, or Pull Apart
Most failed splices come down to the same handful of errors.
Tucking with the lay instead of against it
This is the most common beginner mistake. If you tuck a strand in the same direction the rope is twisted, it sits on top instead of locking in. The visual tell: individual tucks slide sideways with a fingernail even after you've pulled them tight.
Always tuck against the lay.
Too few tucks
Three tucks is the minimum for a secure splice. Two tucks will hold light loads temporarily but pull through under sustained tension. For outdoor garden rope under any real load, use four to five tucks and taper the final round by halving each strand's thickness.
Uneven tension across strands
If one strand is pulled tighter than the others, the splice torques and bunches to one side. A well-made splice has a clean, symmetrical braid. If yours looks lopsided when finished, the tension was uneven during tucking.
Not taping strand ends before unlaying
Skip the tape on your strand tips and they'll splay before you finish the first tuck. Frayed ends are hard to work into tight spaces and reduce the grip of each tuck.
Trying to splice braided rope
Braided rope has no separable strands. Attempting a 3-strand splice on it damages the sheath and weakens the core. For a reliable twisted cord, stick to laid constructions only.
How to Check, Care For, and Know When to Replace a Spliced Rope
Once a splice is made, it's not set-and-forget. The fiber around it degrades with weather, load cycles, and UV exposure.
For natural fiber ropes like jute and sisal, repeated wetting and drying weaken the structure over time. In most UK and US garden climates, expect one to three seasons of reliable outdoor service. Storing them dry over winter can add at least one more season to that.
Synthetic twisted ropes last longer outdoors but aren't immune. Extended direct sun causes polypropylene fiber to stiffen and craze. If the surface looks chalky or powdery, the rope has lost too much integrity to trust under load.
How to inspect a splice
Run your fingers along each tuck. The strands should feel firm and sit tight against the standing rope. If any tuck slides sideways under light finger pressure, the splice needs remaking.
Look for uneven bulging to one side, which signals that a strand has lost tension. Check the eye shape too. A well-made eye stays round.
An oval or collapsed eye means load has been distributed unevenly over time.
When to replace the rope entirely
Don't just remake the splice if you notice any of these:
- Visible strand breakage or heavy fuzzing across more than 20 percent of the rope's length
- Cracking or powdering on synthetic fiber
- Soft, spongy spots anywhere along the rope body
- A splice that continues to slip after being remade
Frequently Asked Questions
How many tucks do I need for a secure garden rope splice?
Three full tuck rounds is the minimum for light garden use. For anything load-bearing or exposed to sustained outdoor tension, use four to five tucks and taper the final round by halving each strand's thickness. Fewer than three tucks will pull through under any real stress.
Can I splice braided garden rope?
Standard 3-strand technique doesn't work on braided rope. Braided rope has a core-and-sheath construction with no separable strands, so it needs a hollow fid and a specialist braided splice method. For a straightforward DIY splice, switch to a 3-strand twisted rope.
Does splicing weaken the rope?
No. A correctly made eye splice retains around 90 to 95 percent of the rope's rated breaking strength. A knot at the same location drops that figure to around 65 to 70 percent.
Done right, the splice is the strongest part of the rope.
How do I stop the strands unraveling while I work?
Tape the seizing point firmly before unlaying, then tape each individual strand tip too. For synthetic rope, briefly heat-seal the strand tips with a lighter before applying tape. This keeps strand ends clean and manageable throughout the tucking process.
What's the difference between a short splice and a long splice?
A short splice is bulkier at the join (around 1.5 times the rope's diameter) but stronger and much easier to make. A long splice keeps the rope's original diameter throughout, which matters if the rope needs to pass through a block or fitting. For most garden repairs, the short splice is the right call.
Similar Posts