How to Install Bird Netting Over Fruit Bushes
Learning how to install bird netting over fruit bushes is one of those garden tasks that looks straightforward until you end up with half-eaten currants and a tangle of netting on the ground. The most common reason it fails comes down to one mistake: laying netting directly on the bush without any support frame.
As of 2026, the RHS recommends a maximum mesh size of 20mm for effective soft fruit protection against common garden birds like blackbirds and starlings. Beyond mesh size, how you anchor the edges and build the frame makes all the difference. Get those two things right and your fruit stays intact from first blossom to last pick.
Quick Answer
To install bird netting over fruit bushes, build a support frame first. Push bamboo canes around the bush perimeter. Drape netting over the frame, not the plant.
Pull the edges down to ground level. Secure them with ground pegs every 30-40cm.
Why Netting Laid Directly on Bushes Fails (and What to Do Instead)
Birds can peck right through netting that sits against a bush. A blackbird doesn't need to get inside to do damage. It simply stands on the outside and picks through the mesh.
You end up with netting that looks untouched and fruit that's already stripped.
The second issue is gaps at the base. A fruit bush isn't a neat, symmetrical shape. Netting draped straight over branches folds and bunches along the edges, creating openings birds walk straight through.
Once inside, they often can't find the exit. That makes entrapment a real risk, something the RSPB highlights as one of the most common problems with incorrectly fitted garden netting.
A support frame solves both problems at once. It holds the netting at least 15cm above the outermost branches, so birds can't reach the fruit through the mesh. It also keeps the netting taut, reducing the folds that create entry points at ground level.
Think of it as a tent, not a blanket. The bush sits underneath, the netting forms a canopy above, and that gap between them is what makes the whole system work. A frame also gives you a fixed structure to attach the netting edges to, rather than pinning loose fabric into the soil.
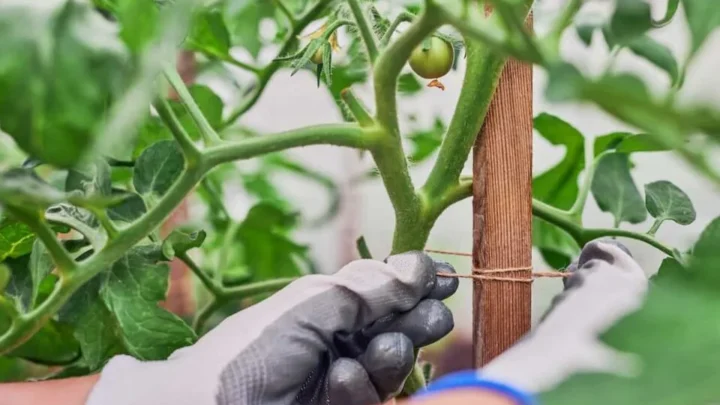
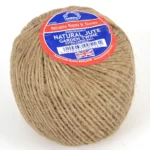
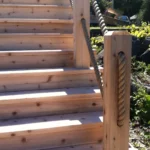
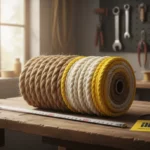
If you use plant-safe natural cord for vegetable training, you've already got the right fixings on hand.
Choosing the Right Netting: Mesh Size, Material, and What Actually Matters
The two things that determine whether your netting works are mesh size and material. Colour, brand, and price per metre are secondary.
Mesh size is the critical factor. A 20mm mesh stops blackbirds, starlings, and robins. If sparrows or finches are the regular problem in your garden, drop down to 10mm.
Anything larger than 25mm and small birds can push straight through. Avoid monofilament netting entirely. It's nearly invisible, which makes it dangerous for birds and hedgehogs alike.
| Material | Lifespan | Notes |
|---|---|---|
| UV-stabilised polypropylene | 3-10 years | Best all-round choice |
| Knitted polyethylene | 2-5 years | Lighter, good for single seasons |
| Natural jute fibre | 1 season | Biodegradable, eco-friendly |
| Monofilament | Avoid | High entrapment risk |
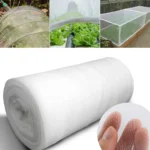
UV-stabilised polypropylene is the practical standard for most home gardens. It handles UV exposure across multiple seasons without degrading. If you prefer biodegradable materials and already work with natural fibre for plant support, jute netting fits that approach well.
Just plan to replace it each season.
Colour is mostly personal preference. Black netting makes it easier to spot a trapped bird against the mesh. Green blends into the garden more naturally.
Either works if the mesh size and anchoring are correct.
What You Need Before You Start
Frame materials and support options
The frame has one job: hold netting above the bush through wind, rain, and the weight of the mesh. Three options cover most garden situations:
- Bamboo canes (1.2-1.8m): Pushed into the soil around the bush, topped with plastic bottle caps or cane toppers to stop netting snagging on the tips.
- Wire hoops: Pre-formed or hand-bent garden wire arched over smaller bushes. Good for low-growing blueberries.
- Permanent soft fruit cage: A timber or metal frame with fixed netting panels. Best for multiple bushes in a dedicated growing area.
Tools and fixings
| Item | Purpose |
|---|---|
| Bamboo canes (1.2-1.8m) | Vertical frame posts |
| Garden wire or cane connectors | Crossbar and horizontal support |
| Ground pegs or U-pins | Anchoring netting edges |
| Bricks or flat stones | Alternative edge weights |
| Scissors or snips | Trimming netting to fit |
| Netting clips or cable ties | Attaching netting to frame |
For lashing cane joints or connecting frame sections, durable plant-friendly cord handles this well without scratching stems or cutting into the netting fabric.
How to Build a Simple Support Frame Over Your Fruit Bushes
The goal is a freestanding structure that clears the top and sides of the bush by at least 15cm all around.
Step 1: Measure the bush. Check height and spread. Add 15cm on each side for clearance. That gives you the minimum frame footprint before you cut or buy any materials.
Step 2: Push canes into the ground. Space them evenly around the bush perimeter, roughly 40-50cm apart. Push each one at least 20cm deep for stability. Four canes is enough for a medium currant or gooseberry bush.
Step 3: Add a horizontal crossbar. Run a cane or garden wire across the top, connecting the vertical supports. This is the highest point the netting will drape over, so it needs to sit above the tallest branch tip.
Step 4: Check clearance from all sides. Stand back and view the frame from the side. The top bar should clear the highest branch by at least 15cm. The outer canes should extend 15cm beyond the widest growth.
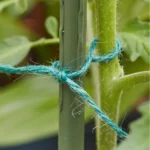
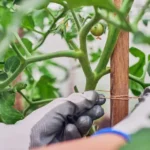
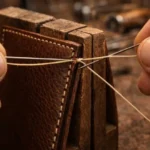
Step 5: Tie all connections firmly. Lash crossbars to vertical canes using weather-resistant garden twine. A loose joint will sag once the netting weight is added. Tie each connection snugly and check it before moving on.
How to Drape, Anchor, and Seal the Netting Correctly
With the frame in place, installation goes quickly if you follow the right order.
Step 1: Unfold the netting completely before you start. Tangles during installation are hard to fix once the net is over the frame. Lay it flat on the ground first and shake out any folds.
Step 2: Drape from the centre outward. Lift the netting and place the middle of it over the highest point of the frame. Let it fall naturally on all sides before adjusting anything.
Step 3: Work the edges down evenly. Walk around the bush, easing the net down on each side at the same rate. You want even coverage all the way around, not one side pulled lower than the other.
Step 4: Secure the edges at ground level. Push ground pegs or U-pins through the netting edge into the soil every 30-40cm. Use bricks or flat stones as an alternative. No gap wider than a small bird's body should remain at the base.
Step 5: Build in an access point. Don't seal the entire perimeter shut. Overlap two netting edges by 30cm on one side and clip them together. When it's time to harvest, unclip that section and fold it back.
Add an extra peg at each corner after the main perimeter is anchored. Corners are where gaps form first.
Timing: When to Put It On, When to Take It Off
Get the timing wrong and even a perfectly fitted net can reduce your crop. Netting too early blocks bees and other pollinators during flowering, which cuts fruit set before birds are even a factor. Netting too late and the damage is already done.
The right window is after flowering is complete but before the fruit starts to colour and attract attention. For most UK gardens, that falls between late May and early July. Gooseberries ripen earlier than blueberries, so they need covering sooner.
| Fruit | Typical netting window (UK) |
|---|---|
| Gooseberries | Late April to June |
| Redcurrants / whitecurrants | Late May to July |
| Blackcurrants | Late May to late June |
| Summer raspberries | June to July |
| Blueberries | June to August |
If you're unsure whether flowering has finished, look for fallen petals and small fruit swelling at the base of each flower. That's the sign pollinators have done their work and it's safe to net.
Take netting off as soon as picking is complete. Leaving it past harvest wears out the material for no gain. Before reinstalling next season, check all frame connections.
If the twine on your cane joints has slackened over winter, retie those connections before adding the netting.
Mistakes That Let Birds In (or Trap Them Inside)
Most failures trace back to the same three causes: gaps at ground level, netting touching the plant, and poor anchoring at corners. Fixing any one of these makes more difference than upgrading to pricier netting.
Watch for these specific problems:
- Gaps along the base: A 5cm gap is enough for a blackbird to walk straight under. Check the perimeter after any wind and re-peg lifted edges immediately.
- Netting touching branches or fruit: Wherever mesh contacts the plant, birds peck through from outside. The frame must hold the net clear on all sides.
- Loose corners: Corners bunch and lift more than any other part of the perimeter. Add an extra peg at each corner after the main anchoring is done.
- Mesh size too large: If small birds are still getting in, the problem is almost always mesh size. Switch to 10mm netting.
- No daily check: All garden netting carries entrapment risk. Check for trapped birds each morning, especially in the first few days after installation.
The pattern is consistent: skip the frame, birds get in and get trapped. Add it, and most problems disappear.
Frequently Asked Questions
Can I use bird netting on thorny bushes like gooseberries?
Yes, but lift the net in sections rather than dragging it over the plant. Netting snags easily on thorns, which creates tears that birds find quickly. A frame tall enough to keep the mesh completely off the branches solves most of this.
A few extra side pegs stop the netting from sagging back onto thorns mid-season.
How do I stop netting blowing off in wind?
Anchor the edges with ground pegs every 30-40cm and push each frame cane at least 20cm into the ground. On exposed sites, lay a row of bricks or flat stones along the perimeter as a backup. Make sure all crossbar connections are firmly tied before the netting goes on.
What mesh size keeps sparrows out?
A 10mm mesh is the reliable answer. Standard 20mm netting stops blackbirds and starlings but leaves a gap small enough for house sparrows to push through. If sparrows are regularly getting inside what looks like intact netting, switching to 10mm is the only genuine fix.
How long does bird netting last?
UV-stabilised polypropylene netting typically lasts 3-10 years when stored correctly. The key variables are UV exposure during the season and winter storage conditions. Keep it clean, dry, and out of direct sunlight between seasons and it'll outlast most of the frames it's hung on.
Should I leave netting on all year?
No. Leaving netting in place year-round excludes beneficial insects during flowering the following spring, which reduces pollination and your crop size. Remove it after harvest and reinstall it next season once flowering is complete and the small fruit is beginning to swell.

Similar Posts